If you plan to do extensive changes to the menus, we recommend you create a new menu. This way, you keep your current menu live for your patrons while you work on the new menu.
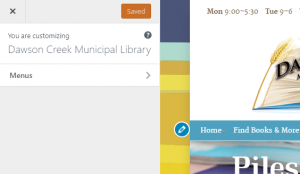 To create a new menu, access the menu editing system in the left sidebar menu of the dashboard, under Appearance > Customize. A new sidebar will appear. Select Menus.
 Then select +Add a Menu.
Give your new menu a name. Hit Create Menu.
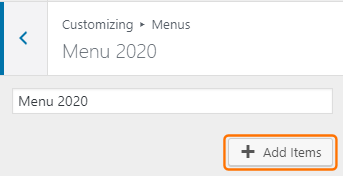 Select + Add Items to start building your new menu.
The same add items list will appear on the right, opening on Pages by default. Add your items the same as you would editing your existing main menu. Refer to 9.1. Editing Menus.
NOTE: You can’t preview your menu until you make it your Primary Menu.
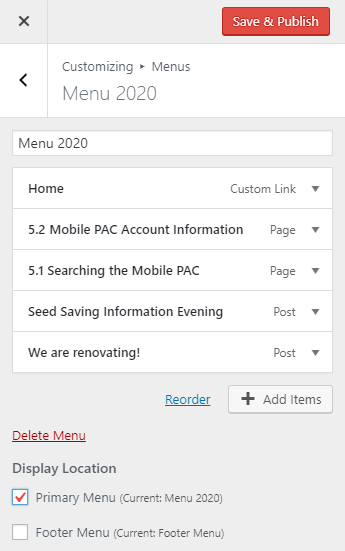
Once you are happy with your new menu, you can make it the live (primary) menu by ticking the Primary Menu box under Display Location. Then use the Save & Publish button at the top of the edit box.
If you need to make an adjustment, you can edit it as would any of your menus. If you want to revert to your previous menu, just select it from the list of available menus and make it the Primary Menu.