- Log into your LibPress website, go to your Dashboard and click Highlights in the left-hand navigation pane.

- This page displays all of the Highlights you’ve created in the past. NOTE: You can only have 3 Published highlights at a time. Other highlights can be saved as Draft for future use.
- You can add a new Highlight in the same way you add a new page by clicking at the top of the page.
- Add text, images (including your own local or shared media) and links in the same way you do for a page.
- To link a Highlight to another page or blog post on your website, select the title of the target page from the drop down list titled Link Highlight to Page/Post. Entries in the drop list are colour-coded green for posts and blue for pages.

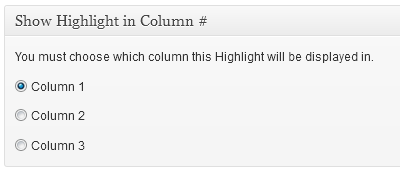
- Scroll to the Show Highlight in Column # box and assign your Highlight to a column (1 for the left-most column, 2 for the middle and 3 for the right-most column).
- Click at the top right of the page and view your home page.
For LibPress Site Managers